You can nail the perfect cold email. Warm domain, clean list, personalized copy. None of it matters if your DKIM is broken.
Inbox providers won’t warn you. They will just route your emails to spam silently.
I run TrulyInbox, an email warm-up tool. I see DKIM failures across customer domains every single day. This is not theoretical for me. It is operational.
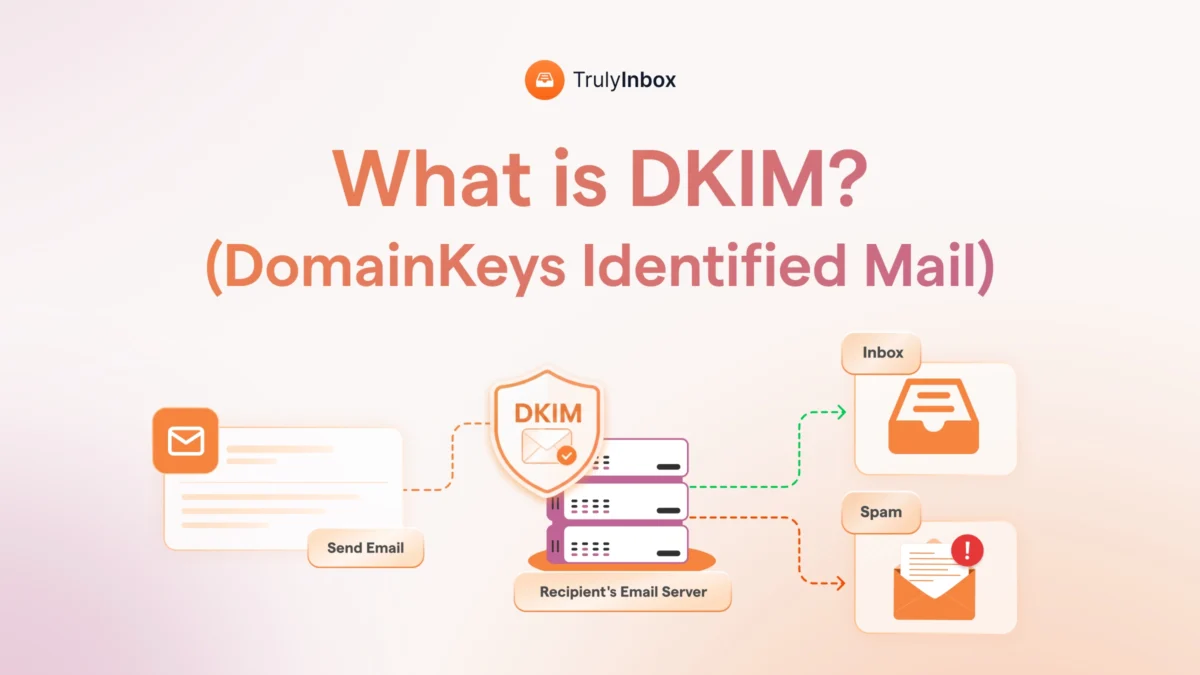
So here is the short version. DKIM stands for DomainKeys Identified Mail. It is an email authentication protocol that adds a cryptographic signature to every outgoing email.
That signature proves two things:
- The email genuinely came from your domain.
- Nobody tampered with it in transit.
This guide covers how DKIM actually works step by step. You will learn how to read a DKIM signature, set it up on major platforms, and fix it when it fails.
I also explain why DKIM is now a hard requirement for Gmail, Yahoo, and Microsoft in 2026.
TL;DR: What Is DKIM and Why It Matters
DKIM is an email authentication protocol. It digitally signs every outgoing email using public-key cryptography.
The system has two parts:
- Private key: Stays on your mail server and signs outgoing emails.
- Public key: Published in your DNS as a TXT record so receiving servers can verify the signature.
When a receiving server gets your email, it looks up your public key. It then checks whether the signature matches. If the signature checks out, the email is confirmed as genuinely from your domain and unmodified in transit.
Here is why this matters right now. Gmail, Yahoo, and Microsoft all require DKIM authentication. Without it, your emails go to spam or get rejected outright.
But DKIM alone is not enough. It works alongside two other protocols:
- SPF authorizes which servers can send on behalf of your domain.
- DMARC sets the enforcement policy when SPF or DKIM fails.
For cold email senders, DKIM is non-negotiable. Every inbox you connect and every domain you set up needs DKIM configured before you send a single email.
Below, I break down exactly how the signing process works. I cover what each part of a DKIM header means and how to set it up on Google Workspace and Microsoft 365. I also walk through what to do when DKIM fails.
Related resources to bookmark:
- Learn how to set up SPF, DKIM, and DMARC with our step-by-step guide.
- Use our free DKIM record generator to create your keys instantly.
What Is DKIM? (The Plain English Version)
DKIM stands for DomainKeys Identified Mail. It is an email authentication method that uses cryptographic signatures to verify two things: sender identity and message integrity.
It was born from a merger of two earlier protocols.
Yahoo created DomainKeys, and Cisco developed Identified Internet Mail. The two merged into DKIM and were published as RFC 6376 in 2011.
Since then, DKIM has moved from optional to mandatory. Every major inbox provider now requires it as a baseline authentication standard.
One thing DKIM does not do is encrypt your email content. The email is still fully readable by anyone who intercepts it. The signature only proves authenticity.
Also worth noting: the DKIM signature is invisible to your recipients. It lives in the email header, not in the body. Your recipients never see it, but receiving servers always check it.
Most competitor guides explain DKIM from an IT security lens. That framing misses the point for people who actually send emails for a living.
If you run cold outreach, marketing campaigns, or transactional emails, here is what DKIM means for you:
- It tells inbox providers your emails are legitimate.
- It protects your messages from being altered by intermediaries.
- It directly impacts whether your emails reach the inbox or land in spam.
Without DKIM, you are sending unauthenticated emails. And in 2026, unauthenticated emails do not reach inboxes.
How DKIM Works: Step by Step
DKIM follows a three-step process. Your server signs the email, publishes a verification key, and the receiving server checks both. Here is how each step works.
Step 1: Key Pair Generation
Your email platform generates two cryptographic keys. These keys are mathematically linked but serve opposite functions.
- Private key: This stays on your mail server. It is secret, and only your server uses it to sign outgoing emails.
- Public key: This gets published in your domain’s DNS as a TXT record. Receiving servers use it to verify your signatures.
Most managed platforms handle key generation automatically. Google Workspace and Microsoft 365 both create the key pair for you during setup.
If you use a custom SMTP server or a third-party ESP, you may need to generate the keys yourself. I cover that in the setup section below.
Step 2: Signing the Email
When you hit send, your mail server does not just dispatch the email. It first creates a unique fingerprint of the message.
Here is what happens technically:
- The server selects specific email elements to sign. These typically include the body, From header, Subject, and Date.
- It runs those elements through a hashing algorithm (usually SHA-256) to generate a unique hash value.
- It encrypts that hash using the private key, creating the DKIM signature.
- It attaches the signature to the email as a hidden header field called “DKIM-Signature.”
The recipient never sees this header. But the receiving server reads it immediately upon delivery.
Step 3: Verification by the Receiving Server
The receiving server (Gmail, Outlook, Yahoo, etc.) reads the DKIM-Signature header as soon as your email arrives. Then it runs its own verification process.
Here is the sequence:
- It extracts the domain (d=) and selector (s=) values from the DKIM-Signature header.
- It looks up the corresponding public key in the sender’s DNS records.
- It decrypts the signature using that public key to reveal the original hash.
- It independently recalculates the hash from the received email content.
- It compares the two hashes.
If the hashes match, DKIM passes. The email is authentic and was not modified in transit.
If they do not match, DKIM fails. What happens next depends on your domain’s DMARC policy. The email might be flagged, quarantined, or rejected entirely.
Anatomy of a DKIM Signature: What Each Tag Means
This is the section most guides skip entirely. If you ever need to troubleshoot a DKIM failure, understanding these tags is essential.
Here is what a real DKIM-Signature header looks like (from a test email I sent through Google Workspace):
DKIM-Signature: v=1; a=rsa-sha256; c=relaxed/relaxed; d=yourdomain.com; s=google; h=from:to:subject:date:message-id; bh=abc123hashofbody=; b=xyz789encryptedsignature=; t=1714200000; x=1714804800
Now let me break down each tag so you know exactly what you are looking at.
- v= Version. Always “1” for current DKIM implementations.
- a= Signing algorithm. Usually rsa-sha256. This tells the receiver which algorithm was used to create the hash.
- d= Signing domain. This is your domain. It tells the receiver whose DNS to query for the public key.
- s= Selector. Identifies which specific key to look up in DNS. A single domain can have multiple selectors for different sending services.
- h= Signed headers. Lists which email headers were included in the hash. Typically includes From, To, Subject, and Date.
- bh= Body hash. The hash of the email body. The receiving server recalculates this and compares it to the value here.
- b= The signature itself. This is the encrypted hash that the receiving server decrypts using your public key.
- c= Canonicalization. Defines how whitespace and headers are normalized before hashing. “relaxed/relaxed” is the most common and forgiving setting.
- t= Timestamp. Records when the email was signed. Expressed as a Unix timestamp.
- x= Expiration. Optional. Sets when the signature expires. Not all senders use this.
From a practical standpoint, here is what matters most for troubleshooting:
- The d= and s= values tell you exactly which DNS record to check.
- The b= value is what the receiving server actually verifies.
- If bh= does not match the received body, something modified your email in transit.
Why DKIM Matters for Email Deliverability in 2026
Every competing guide frames DKIM as a security protocol. That framing misses what actually matters to email senders. DKIM is a deliverability requirement, and here is why.
Gmail, Yahoo, and Microsoft Now Require DKIM
This is no longer optional. The three largest inbox providers have all mandated DKIM authentication.
- Google and Yahoo required DKIM for all senders starting February 2024.
- Microsoft Outlook made DKIM mandatory for high-volume senders starting May 2025.
Without DKIM, your emails get rejected or sent to spam. No exceptions, no workarounds. It is a gatekeeper requirement.
If you are still treating DKIM as a “nice to have,” you are already behind. Check your authentication status using Google Postmaster Tools to see how Gmail currently evaluates your domain.
DKIM Builds Sender Reputation Over Time
Inbox providers track your domain’s DKIM pass rate as a reputation signal. Consistent DKIM passes across thousands of emails build a stronger trust score.
This is exactly why email warm-up matters.
During warm-up, you build a track record of authenticated, engaged emails before scaling to cold outreach.
If your DKIM is not passing, your warm-up is building reputation on a broken foundation. Every warm-up email that fails DKIM verification works against you instead of for you.
At TrulyInbox, I see this pattern regularly. Senders invest weeks in warm-up but skip DKIM setup. Their reputation never climbs because inbox providers see unauthenticated emails, regardless of engagement.
DKIM Survives Email Forwarding (SPF Doesn’t)
This is a critical distinction most guides gloss over. SPF breaks when emails get forwarded.
Here is why. SPF validates the sending server’s IP address. When someone forwards your email, the forwarding server’s IP is not in your SPF record. So SPF fails.
DKIM signatures stay intact because they are attached to the email itself. They are not tied to any specific server. The signature travels with the message no matter how many times it gets forwarded.
This makes DKIM the more resilient authentication method for:
- Email forwarding
- Mailing lists
- Auto-forwarding setups
- Shared mailbox environments
If you rely on referrals, introductions, or any workflow where emails get forwarded, DKIM is your safety net.
DKIM vs SPF vs DMARC: How They Work Together
Each protocol does a different job. You need all three working together for proper email authentication. Here is how they compare.
| Protocol | What It Checks | Where It Lives | Survives Forwarding? | Required for DMARC? |
| SPF | Sending server IP | DNS TXT record | No | Yes (or DKIM) |
| DKIM | Email signature + integrity | DNS TXT record + email header | Yes | Yes (or SPF) |
| DMARC | SPF/DKIM alignment | DNS TXT record | N/A (policy layer) | N/A |
Here is how they connect in practice:
- SPF authorizes which servers can send email on behalf of your domain. It is IP-based.
- DKIM signs emails with a cryptographic signature to prove identity and integrity. It is content-based.
- DMARC tells receiving servers what to do when SPF or DKIM fails. It is the policy and reporting layer.
The key concept most setup guides miss is alignment. DMARC requires either SPF or DKIM to pass and align with the From domain. “Align” means the domain in the authentication check matches the domain in your visible From address.
In practice, you want both SPF and DKIM passing. Relying on just one creates a single point of failure.
For step-by-step setup instructions for all three, see our guide on how to set up SPF, DKIM, and DMARC.
How to Set Up DKIM for Your Domain
The setup process varies by platform. Below, I cover the three most common scenarios. I verified these steps in Google Workspace and Microsoft 365 as of April 2026.
Google Workspace
Google Workspace makes DKIM setup straightforward. Follow these steps:
- Log in to Google Admin Console.
- Navigate to Apps > Google Workspace > Gmail > Authenticate Email.
- Select your domain.
- Click “Generate new record” (choose 2048-bit key length).
- Copy the generated TXT record.
- Add the TXT record to your domain’s DNS.
- Return to Google Admin Console and click “Start authentication.”
The default selector for Google Workspace is “google.” DNS propagation can take up to 48 hours, so do not panic if authentication does not activate immediately.
Microsoft 365
Microsoft 365 uses CNAME records instead of TXT records for DKIM. Here is the process:
- Open Microsoft 365 Defender.
- Go to Policies > Email authentication > DKIM.
- Select your domain.
- Enable DKIM signing.
- Publish the two CNAME records Microsoft provides to your DNS.
Microsoft uses two selectors: selector1 and selector2. Both CNAME records must be published for DKIM signing to activate.
Custom SMTP / Third-Party ESPs
If you use services like SendGrid, Mailgun, Amazon SES, or Postmark, each one provides its own DKIM keys. You need a separate DKIM record with a unique selector for each service that sends email on behalf of your domain.
Here is the general process:
- Generate a DKIM key pair (or get the keys from your ESP’s dashboard).
- Publish the public key in your DNS as a TXT record using the selector your ESP provides.
- Enable DKIM signing in your ESP’s settings.
For custom setups, use our free DKIM record generator to create your key pairs.
One critical rule: never reuse the same selector across multiple services. Each sending service needs its own selector to avoid conflicts and overwrites.
How to Verify Your DKIM Record Is Working
After setup, always verify. Do not assume it is working just because you published the DNS record.
Here is how to check:
- Send a test email to a Gmail account.
- Open the email and click “Show Original.”
- “Look for “DKIM: PASS” in the authentication results.
You can also use these tools for a more thorough check:
- MXToolbox DKIM Lookup: Enter your domain and selector to verify the DNS record exists and is properly formatted.
- Google Admin Toolbox: Checks your full email authentication setup including SPF, DKIM, and DMARC.
Confirm that the selector and domain in your DNS record match the values in your DKIM-Signature header. A mismatch here is one of the most common causes of DKIM failure.
What Happens When DKIM Fails (And How to Fix It)
DKIM failures are more common than most senders realize. The tricky part is that failures are silent. You will not get an error message. Your emails will just quietly land in spam.
Common DKIM Failure Reasons
When I see DKIM failures across customer domains at TrulyInbox, these are the top five causes I check first:
- DNS record not published or contains a typo. Even a single misplaced character breaks verification.
- Selector mismatch. The selector in the email header does not match the selector in DNS.
- Email modified in transit. A security gateway, email relay, or footer appender changed the email body or signed headers after signing.
- Key rotation gone wrong. The old key was removed before the new key fully propagated.
- Weak key length. Using a 1024-bit key when the receiving server expects 2048-bit. This is increasingly common.
How to Read a DKIM Failure in Email Headers
Understanding what DKIM failure looks like in raw headers helps you diagnose the problem faster. Here is what to look for.
Open the email in Gmail and click “Show Original.” Scroll to the Authentication-Results header. You will see one of these:
- dkim=pass means everything is working correctly.
- dkim=fail means the signature verification failed. The hashes did not match.
- dkim=neutral means the receiver found a DKIM signature but could not verify it. This often indicates a missing or malformed DNS record.
The Authentication-Results header also shows which selector and domain were checked. Compare these against your DNS records to spot mismatches.
For a deeper dive into reading and interpreting email headers, check out our guide on what email headers are and how to read them.
How to Fix DKIM Failures
Once you have identified the failure, here is the systematic fix process:
- Verify your DNS record exists. Run this command in terminal: nslookup -type=txt selector._domainkey.yourdomain.com
- Check selector alignment. The selector in your DNS must exactly match the s= value in your DKIM-Signature header.
- Inspect for intermediary modifications. Footer injection, signature appending, and URL rewriting by security tools can all break DKIM. Disable these temporarily and retest.
- Regenerate and republish keys if they are compromised, expired, or using 1024-bit encryption.
- Wait for DNS propagation. Some registrars take up to 48 hours to propagate changes. Test again after propagation completes.
If your emails are already landing in spam due to DKIM failures, pause your campaigns immediately. Fix the DKIM issue first, then resume sending gradually with a proper warm-up process.
Common DKIM Mistakes That Hurt Deliverability
These mistakes come directly from issues I see in practice. Each one ties to a real deliverability consequence.
- Using 1024-bit keys instead of 2048-bit. Some providers are beginning to flag weaker keys. 2048-bit is non-negotiable in 2026. Regenerate if you are still on 1024-bit.
- Not enabling DKIM signing after publishing the DNS record. This is surprisingly common. The DNS record exists, but the mail server is not actually signing outgoing emails. Publishing the key and activating signing are two separate steps.
- Reusing the same selector for multiple sending services. Each service needs its own unique selector. Reusing selectors causes overwrites and conflicts that break verification for one or more services.
- Forgetting to set up DKIM for every service that sends on your domain’s behalf. Your marketing tool, CRM, helpdesk, and transactional email service all need their own DKIM records. Miss one, and emails from that service fail DKIM.
- Not rotating keys periodically. Security best practice recommends rotating DKIM keys every 6 to 12 months. Stale keys increase the risk of compromise.
- Modifying emails after signing. Footer appenders, tracking pixel injectors, and email relay services can alter the email body after DKIM signs it. This breaks the hash and causes DKIM failure.
- Not testing after DNS changes. Always send a test email and check headers after any DKIM update. Use our email deliverability checklist to make sure nothing slips through the cracks.
FAQs About DKIM
1. What Does DKIM Stand For?
DKIM stands for DomainKeys Identified Mail. It is an email authentication protocol that uses cryptographic signatures to verify sender identity and message integrity.
2. Is DKIM Required for Sending Email?
Yes. Gmail, Yahoo, and Microsoft all require DKIM authentication. Without it, your emails will likely land in spam or get rejected outright.
3. What Is the Difference Between DKIM and SPF?
SPF checks whether the sending server is authorized to send on behalf of your domain. DKIM checks whether the email content was tampered with and confirms the domain owner signed it. You need both for proper authentication.
4. Can I Have Multiple DKIM Records?
Yes. Unlike SPF, which allows only one record per domain, you can have multiple DKIM records using different selectors. Use one selector for each service that sends email on your behalf.
5. Does DKIM Encrypt My Emails?
No. DKIM signs your emails, but it does not encrypt them. The email content is still readable. The signature only proves the email is authentic and unmodified.
6. What Key Length Should I Use for DKIM?
Use 2048-bit. While 1024-bit keys still work, they are considered weaker. Some providers are beginning to flag them. 2048-bit is the current standard and the minimum you should use.
7. How Do I Check if My DKIM Is Set Up Correctly?
Send a test email to a Gmail account. Open it, click “Show Original,” and look for “DKIM: PASS” in the authentication results. You can also use MXToolbox or Google Admin Toolbox to look up your DKIM DNS record directly.