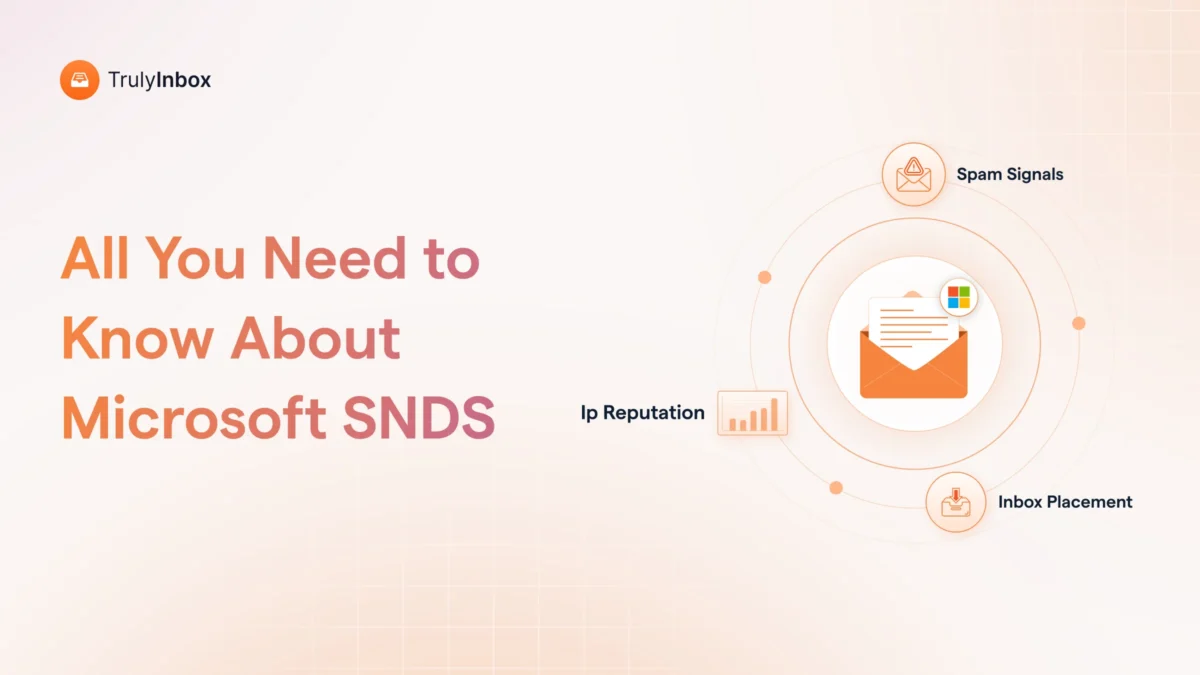
Microsoft SNDS is the only free tool that shows how Outlook and Hotmail filters treat your sending IP.
Most senders set it up, glance at a few colors, and close the tab.
In this blog, I will cover:
- Complete SNDS setup (including JMRP)
- Every dashboard metric explained
- How to read SNDS during email warm-up
- A fix playbook for red and yellow statuses
- The 2026 updates most guides have missed
- What SNDS cannot tell you
Quick disclosure: I run TrulyInbox, an email warm-up tool. I monitor SNDS dashboards daily across hundreds of IPs. I will flag where that context matters throughout the post.
TL;DR: Everything You Need
SNDS stands for Smart Network Data Services. Microsoft built it as a free, IP-based monitoring tool for email senders.
It shows how Outlook.com, Hotmail, and Live.com spam filters view your sending traffic.
You get data on IP reputation color, complaint rates, spam trap hits, and message volume.
Setting it up requires three things:
- A Microsoft account
- A dedicated IPv4 address
- Access to the email listed in your IP’s WHOIS record
Once you verify ownership, data appears within 24 to 48 hours. You need to send at least 100 messages per day to Microsoft consumer domains.
The most useful metric is the filter result color:
- Green = less than 10% of messages got a spam verdict
- Red = more than 90% got a spam verdict
- Yellow = anywhere from 10% to 90% (intentionally vague)
During email warm-up, SNDS catches reputation drops early. If yellow appears in your first two weeks, slow your ramp immediately.
However, SNDS only covers consumer Microsoft domains.
It shows nothing for Office 365, Microsoft 365 Business, or Exchange accounts. B2B senders get an incomplete picture.
For full coverage, pair SNDS with Google Postmaster Tools and inbox placement testing.
Below, I break down every metric, share real warm-up data patterns, and cover the 2026 changes.
What Is Microsoft SNDS?
Microsoft Smart Network Data Services is a free tool for monitoring your sending IP’s reputation. It covers Outlook.com, Hotmail, Live.com, and MSN inboxes.
SNDS works at the IP level.
This makes it fundamentally different from Google Postmaster Tools, which tracks reputation at the domain level.
That distinction matters in several ways:
- Switch IPs and your reputation history disappears
- Multiple domains on one IP get blended together
- You cannot isolate domain-level performance
SNDS serves senders who use dedicated IPs and send 100+ daily messages to Microsoft recipients.
If you warm up cold email inboxes that target Outlook recipients, SNDS shows whether Microsoft trusts your IP.
What Data SNDS Provides
Once your account is live and you hit the volume threshold, the dashboard surfaces several key metrics.
Each one reveals something different about how Microsoft views your sending behavior.
Here is what you get:
- IP reputation color (green, yellow, or red based on SmartScreen verdicts)
- Message volume broken into RCPT commands and DATA commands
- Complaint rate (percentage of recipients who marked you as spam)
- Spam trap hits (sends to Microsoft-maintained trap addresses)
- HELO/EHLO command from your server’s SMTP handshake
- Comments column showing status indicators like “Abuse Reported” or “JMR Block”
- Sample messages (though the 2026 update limits this)
The filter result color and complaint rate tell the biggest story. Everything else provides supporting context around those two core metrics.
What SNDS Does NOT Cover
Most SNDS guides skip this section entirely. For cold email senders, it might be the most important one.
The biggest gap is Office 365 and Microsoft 365 Business data.
SNDS only monitors consumer domains like Outlook.com and Hotmail. Business inboxes are completely invisible.
Here are the other blind spots:
- No shared IP support. You need a dedicated IP to access SNDS at all.
- No domain-level data. You cannot isolate individual sending domain performance.
- 100-message daily minimum. New warm-up IPs show no data for the first few days.
- 90-day data retention. Anything older than three months disappears permanently.
- No user override visibility. Individual Outlook users can rescue spam-filtered mail or junk legitimate messages. SNDS does not reflect those actions.
If your cold outreach targets business recipients, SNDS gives you roughly 4% visibility.
You need additional tools to cover the rest.
How to Set Up Microsoft SNDS (Step-by-Step)
Set up SNDS before you start warming up new inboxes. That way you have baseline data from Day 1.
Prerequisites you need in place:
- A Microsoft account (Outlook, Hotmail, or M365)
- A dedicated IPv4 address you control
- Access to the abuse or postmaster email in your IP’s WHOIS record
Setup steps:
- Visit the SNDS portal at the updated URL (Microsoft migrated it in January 2026)
- Sign in with your Microsoft account
- Submit an access request with your IP address, CIDR range, or ASN
- Select the authorization email from the WHOIS-based list
- Click the verification link Microsoft sends to that email
Your dashboard starts populating within 24 to 48 hours. You must already send at least 100 daily messages to Microsoft consumer domains for data to appear.
SNDS retains 90 days of historical data.
How to Set Up JMRP (Junk Mail Reporting Program)
While you are in the SNDS dashboard, take five minutes to set up JMRP.
Microsoft’s Junk Mail Reporting Program sends you a copy of any message a recipient marks as junk.
For cold email senders, JMRP is valuable because it identifies which specific messages get junked. You see the problem at the message level, not just the aggregate level.
How to set it up:
- Open the SNDS dashboard
- Navigate to the feedback loop settings
- Link your JMRP feed to your SNDS account
That third step is critical. As of the 2026 update, all JMRP feeds must link to an SNDS account. Microsoft will remove unlinked feeds.
One caveat about the 2026 ARF format change. Complaint reports now include only:
- Original message headers
- Selected authentication headers (Authentication-Results, Received-SPF)
The sender address is redacted. The full email body is no longer appended. This means you lose the ability to review complaint-triggering content directly through JMRP.
You now need to rely on your own tracking and A/B testing for content-level diagnosis.
Common Setup Issues and Fixes
If your dashboard is empty or you are stuck during setup, check these common issues first.
WHOIS data points to your hosting provider, not you.
Many hosts register IP blocks under their own contact info. Coordinate with your provider to update the registration or add your postmaster email.
Outdated contact email in WHOIS.
If the listed email does not exist, you will never receive the verification link. Update your WHOIS records before requesting access.
You are on a shared IP.
SNDS does not work with shared IPs. You need a dedicated IP address.
Dashboard is set up but shows no data.
This usually means you send fewer than 100 daily messages to Microsoft consumer domains. It is a volume threshold issue, not a configuration error.
For anything else, contact Microsoft at [email protected].
You can also check the official FAQ at sendersupport.olc.protection.outlook.com/snds/FAQ.aspx.
SNDS Dashboard Breakdown: What Every Data Point Means
Your account is live. Now let’s walk through what you are actually looking at.
Most guides describe the dashboard columns.
This section interprets them so you know what each metric means for your reputation and what to do when something shifts.
When I review this data across the IPs I monitor for TrulyInbox users, I check the filter result color and complaint rate first. Those two metrics tell the biggest story.
Everything else provides context.
IP Reputation: Green, Yellow, and Red
This is the most important metric in the dashboard. It is also the most misunderstood.
The filter result color shows what percentage of your messages received a spam verdict from SmartScreen:
- Green = less than 10% flagged as spam
- Red = more than 90% flagged as spam
- Yellow = 10% to 90% (intentionally broad)
Microsoft keeps yellow vague on purpose. Their FAQ states they must be careful not to provide data that might assist spammers.
Here is a practical trick straight from Microsoft’s FAQ that most guides never mention.
Compare your yellow IP against your other IPs. If the rest are green, your yellow IP likely sits near the 10% end.
If most others are red, the yellow one probably sits near 90%.
The same logic works when reviewing a single IP’s color history over time. This comparison method is the best way to narrow down what yellow actually means.
The filter result does not directly represent inbox vs. junk placement. User-controlled settings can override filter results at the individual level.
RCPT vs DATA Commands: How to Spot Rejections
This metric gives you an early warning system for delivery problems. Most senders overlook it entirely.
Here is how it works:
- RCPT commands = recipients your server attempted to reach
- DATA commands = messages Microsoft actually accepted for processing
- The gap = messages Microsoft rejected before delivery completed
For example, 1,000 RCPT commands and 950 DATA commands means Microsoft rejected 50 messages.
A small gap is normal. A large or growing gap signals trouble.
Common causes of a widening gap:
- Poor list quality (invalid addresses)
- IP blocklist inclusion
- Namespace mining behavior
If you notice this gap widening during warm-up, stop and validate your entire list. Remove hard bounces, verify addresses, and check blocklists using MXToolbox or Spamhaus.
Complaint Rate: What the Numbers Mean
Microsoft calculates complaint rate by dividing complaints by message recipients. Complaints include marking as spam, moving to junk, or using “report as junk.”
One detail catches many senders off guard. Microsoft logs complaints on the day recipients report them, not the day you sent the email.
Your rate can occasionally appear above 100% because of this timing gap.
That looks alarming but it is a reporting artifact, not an actual error.
Key benchmarks and actions:
- More than 30% of IPs on Outlook.com keep complaint rates below 0.3%
- Target that 0.3% threshold during warm-up
- Above 0.3% during warm-up means slow your ramp immediately
- Review content, check sending frequency, and segment unengaged contacts
Cold email senders tend to see higher complaint rates than opt-in senders. Recipients did not request the messages.
Also Read: Email Deliverability Metrics You Should Track in 2026
This makes monitoring even more critical during early warm-up stages.
Spam Trap Hits
Spam traps are email addresses Microsoft maintains that never subscribe to anything.
They exist solely to catch senders using purchased lists, scraped addresses, or abandoned inboxes.
Your target is always zero. Unlike complaint rates where a small number is tolerable, any trap hit signals a list hygiene problem.
The challenge is that Microsoft does not reveal which addresses are traps. You cannot simply find and remove them.
Instead, you must clean your entire list.
If you see trap hits:
- Pause your campaigns immediately
- Remove all unengaged and unverified addresses
- Run your list through a verification service
- Check the Trap Message Period column for timing clues
- Do not resume sending until your list is clean
Comments and IP Status
The comments column shows whether Microsoft has taken specific action against your IP. Two values appear most often.
“Abuse Reported” means recipients submitted spam complaints about your messages. Microsoft forwards these through the JMRP feedback loop. Your IP is not necessarily blocked, but complaint volume is elevated.
“JMR Block” is more serious. Microsoft has blocked your IP due to abuse complaints. You must submit a delisting request through the Outlook.com Deliverability Support form.
Do not assume low complaints and clean trap data mean you are safe. Microsoft does not require all indicators to go negative before acting.
Here is why.
If your email is already heavily filtered, recipients rarely see it. Fewer people see it means fewer complaints.
A low complaint rate in that scenario does not mean a healthy IP.
How to Read SNDS During Email Warm-Up
No other SNDS guide covers this, and it is the reason I wrote this post. During email warm-up, SNDS becomes your primary early warning system.
Check SNDS daily for the first two to three weeks of your warm-up. Most senders check back a week later. By then, a fixable yellow could have already turned red.
Daily monitoring during the critical ramp-up window lets you make smart, timely decisions.
What SNDS Looks Like During Warm-Up (Day 1 to Day 21)
- Day 1 to 3: No data. Your warm-up volume sits below the 100-message threshold. The dashboard stays empty. This is completely normal.
- Day 4 to 7: Data starts appearing. You will typically see green or no filter result yet. Volume columns begin populating. Complaint rates should sit at or near zero.
- Day 7 to 14: The critical window. If warm-up is working, the filter stays green and complaints stay low. This is the period where yellow is most likely to appear if something is off. Your response here determines whether warm-up succeeds or fails.
- Day 14 to 21: Stability check. Stable green means your warm-up is progressing well. You can begin cautiously ramping outreach volume. Any red means stop everything.
| Warm-Up Phase | Expected Status | Action |
| Day 1 to 3 | No data | Normal, below volume threshold |
| Day 4 to 7 | Green or blank | Monitor daily, continue ramp |
| Day 7 to 14 | Green | Safe to continue. Yellow means slow down |
| Day 14 to 21 | Stable green | Begin cautious outreach alongside warm-up |
| Day 21+ | Green | Maintain warm-up, check weekly |
When to Slow Down Based on SNDS Signals
Knowing when to pull back matters as much as knowing when to push forward.
Use this trigger-and-response framework during warm-up.
Yellow filter result:
- Reduce daily warm-up volume by 20 to 30%
- Hold that reduced volume for 3 to 5 days
- Re-check the dashboard
- Trending green? Resume your normal ramp gradually
- Stuck or trending red? Escalate to a full audit
Complaint rate above 0.3%:
- Review your email content immediately
- Check your sending frequency
- Segment out unengaged contacts
- Do not continue at current volume until the rate drops
Any spam trap hit:
- Pause campaigns immediately
- Audit your entire list
- Remove all unverified addresses
- Do not resume until the list is confirmed clean
RCPT/DATA gap widening:
- Microsoft is rejecting messages before delivery
- Validate your entire list before continuing
Red filter result:
- Full stop on all campaigns
- Audit lists, content, authentication, and blocklists
- Re-warm from scratch after fixes
Why SNDS Alone Isn’t Enough for Cold Email Warm-Up
Here is the fundamental limitation every cold email sender needs to understand.
SNDS only covers consumer Microsoft domains. That means Outlook.com, Hotmail, Live.com, and MSN.
Most B2B recipients use Office 365, Exchange, or Microsoft 365 Business. SNDS is completely blind to those inboxes.
If you only monitor SNDS, you see your reputation with roughly 4% of email users.
You need additional tools for the full picture:
- Google Postmaster Tools for Gmail reputation (covers another ~30% of recipients)
- Inbox placement testing for cross-provider coverage including Yahoo and corporate filters
The important thing is not relying on SNDS alone. The blind spots are too significant for B2B senders.
Microsoft SNDS vs Google Postmaster Tools
Every deliverability guide mentions Google Postmaster Tools somewhere. None of the current SNDS blogs do a proper comparison.
I check both tools daily, so here is what each one actually gives you.
The core difference is scope. SNDS tracks reputation at the IP level. Google Postmaster Tools tracks it at the domain level. This affects setup, data structure, and interpretation.
For cold email senders, you need both. SNDS covers Outlook reputation. Postmaster Tools covers Gmail reputation.
Together they handle the majority of consumer inboxes.
| Feature | Microsoft SNDS | Google Postmaster Tools |
| Scope | IP-based | Domain-based |
| Coverage | Consumer Microsoft (Outlook, Hotmail, Live) | Gmail |
| B2B Coverage | None (no Office 365/Exchange) | Partial (no Workspace granularity) |
| Reputation Display | Color-coded (green, yellow, red) | Spam rate percentage |
| Setup | Dedicated IP + WHOIS verification | Domain ownership via DNS |
| Minimum Volume | 100 messages per day | Varies (needs significant volume) |
| Data Retention | 90 days | 120 days |
| Feedback Loop | JMRP (junk mail reports) | None |
| Complaint Data | Complaint rate + JMRP reports | Spam rate only |
| Spam Trap Data | Yes | No |
| Authentication Data | HELO/EHLO only | SPF, DKIM, DMARC alignment |
| Shared IP Support | No | Yes (domain-based) |
| Cost | Free | Free |
These tools complement each other. They are not interchangeable.
SNDS excels at IP-level reputation and complaint data for Microsoft. Postmaster Tools excels at domain-level reputation and authentication visibility for Gmail.
Use both, check them regularly, and pair them with inbox placement testing for providers that neither tool reaches.
What Changed in SNDS in 2026
Microsoft made several significant changes in January 2026. No other SNDS guide in the current search results covers them.
If you rely on older tutorials or existing integrations, these updates could break your workflow.
Here is what changed:
- ARF feedback format update. JMRP reports now include only original message headers and selected authentication headers. The sender address is redacted. The full email body is no longer appended. Senders must rely on their own tracking for content diagnosis.
- Portal URL migration. SNDS is moving to a new URL as part of a service update. Update old bookmarks and automated scripts when the new URL goes live.
- Automated report links expire after 30 days. Previously these links persisted indefinitely. Refresh your monitoring scripts monthly to maintain access.
- JMRP feeds must link to SNDS accounts. Standalone JMRP feeds will be removed. Link yours now if you have not already.
- Extra authentication layer added. Microsoft now requires authentication for network access approval and denial.
- Complaint sample downloads discontinued. SNDS no longer provides downloadable complaint samples from the dashboard.
I verified all of these changes from the SNDS portal announcements page, updated January 22, 2026.
How to Fix a Red or Yellow SNDS Status
Most SNDS guides explain what the colors mean. They leave you on your own when it comes to fixing them.
This section gives you a step-by-step playbook based on real IP reputation recovery work.
Your approach depends on your current situation:
- Yellow status? Investigate first, act carefully.
- Red status? Stop sending immediately, audit everything.
- JMR Block? Submit a formal delisting request.
Start by identifying which scenario matches yours. Then follow the corresponding steps below.
If Your Status Is Yellow
Do not panic. Yellow covers an extremely wide range from 10% to 90%. You might sit barely above the green threshold.
1: Diagnose severity.
- Check your complaint rate and trap hits
- If both are low, you likely sit near the green end
- Compare against your other IPs using the Microsoft FAQ trick
2: Take measured action.
- Reduce sending volume by 20 to 30%
- Hold that reduced volume for 3 to 5 days
- Clean unengaged contacts from your list
- Verify SPF, DKIM, and DMARC alignment
3: Re-check and decide.
- Trending back to green? Resume your normal ramp gradually.
- Stuck on yellow or trending red? Escalate to a full audit of lists, content, and authentication.
If Your Status Is Red
Red means more than 90% of your messages received a spam verdict. Stop sending immediately.
Continuing will only make things worse.
Immediate actions:
- Pause all campaigns and warm-up on that IP
- Audit your entire sending list
- Remove unengaged, unverified, and bounced addresses
- Check blocklists using MXToolbox, Spamhaus, and similar tools
- Review email content for spam triggers (excessive links, misleading subjects, missing unsubscribe)
- Verify all authentication records
If Microsoft has actively blocked your IP, submit a delisting request. I cover that process in the next section.
After implementing fixes:
- Treat this as a fresh warm-up cycle
- Start at minimal volume
- Ramp slowly over 2 to 3 weeks
- Monitor SNDS daily throughout recovery
Do not pick up where you left off. Rebuild from scratch.
If Your IP Is Blocked (JMR Block)
A “JMR Block” in your comments column means Microsoft actively refuses mail from your IP.
This goes beyond filtering. Microsoft is rejecting your messages entirely.
How to request delisting:
- Go to the Outlook.com Deliverability Support form (linked from Microsoft’s Postmaster page)
- Provide evidence of list cleanup you have completed
- Include your current authentication records
- Share sending volume details
- Describe the specific steps you took to fix the issue
Expected timeline: 24 to 72 hours for review. Be thorough because vague submissions get denied or delayed.
Prevention going forward:
- Monitor complaint rates weekly
- Maintain your JMRP feedback loop
- Clean lists proactively before they trigger blocks, not after
One important note. The SNDS team cannot process deliverability support requests. They only display data. All support requests go through the main Postmaster site.
Frequently Asked Questions
1. What is Microsoft SNDS?
Microsoft Smart Network Data Services (SNDS) is a free web-based tool for email senders. It lets you monitor your IP reputation with Outlook.com, Hotmail, and Live.com.
SNDS shows how Microsoft’s spam filters perceive your sending traffic. You get data on complaint rates, trap hits, and filter verdicts. The tool serves senders who use dedicated IPs and send at least 100 daily messages to Microsoft consumer recipients.
2. Is Microsoft SNDS free?
Yes, SNDS is completely free. You need a Microsoft account and a dedicated IP with verifiable WHOIS ownership to sign up. There are no paid tiers or premium features.
3. Does SNDS work for Office 365 or Microsoft 365 Business emails?
No. SNDS covers only consumer Microsoft domains like Outlook.com, Hotmail, Live.com, and MSN.
It provides zero data for Office 365, Microsoft 365 Business, Exchange Online, or Entra B2B accounts. This creates a significant blind spot for B2B senders.
4. How many emails do I need to send for SNDS data to appear?
You must send at least 100 messages per day to Microsoft consumer domains. Below that threshold, the dashboard stays empty. Brand-new warm-up IPs may show no data for the first few days until volume crosses this minimum.
No. SNDS only supports dedicated IP addresses. If you send through an ESP’s shared IP pool, you cannot access SNDS for your traffic. Your ESP may offer aggregate reputation data as an alternative.
6. How long does SNDS keep historical data?
SNDS retains 90 days of data. Anything older disappears permanently. For long-term tracking, export data regularly using the CSV export button or the automated data access API. Note that automated report links now expire after 30 days as of the 2026 update.